
DIY Surf-fin home decor
On one of my frequent trips to HIC Surf in Kailua, I came across a bin of discount surf fins and immediately found myself inspired to create something with them.
How could I repurpose these? What could I create?

Lucky for me, my best surfing buddy’s birthday was coming up and I decided to turn one of the fins into a unique piece of home decor for her.
Initially I thought I would paint a fully-colored detailed picture onto the fin, but, inspired by the minimalistic designs of many surf shirts and retro surf shop logos, I decided to take a different angle and paint a simple black-and white line-art design of our favorite surf break.
I had sketched out a design for this a while back using Procreate and decided to use this as inspo!
With this project, I just kind of sent it and let it form as I went along rather than having a clear plan.
In the end, it turned into a simple cute piece of room decor, perfect for any surf-lover’s home.
So, you ready to create your own? Let’s goooo
What you’ll need:
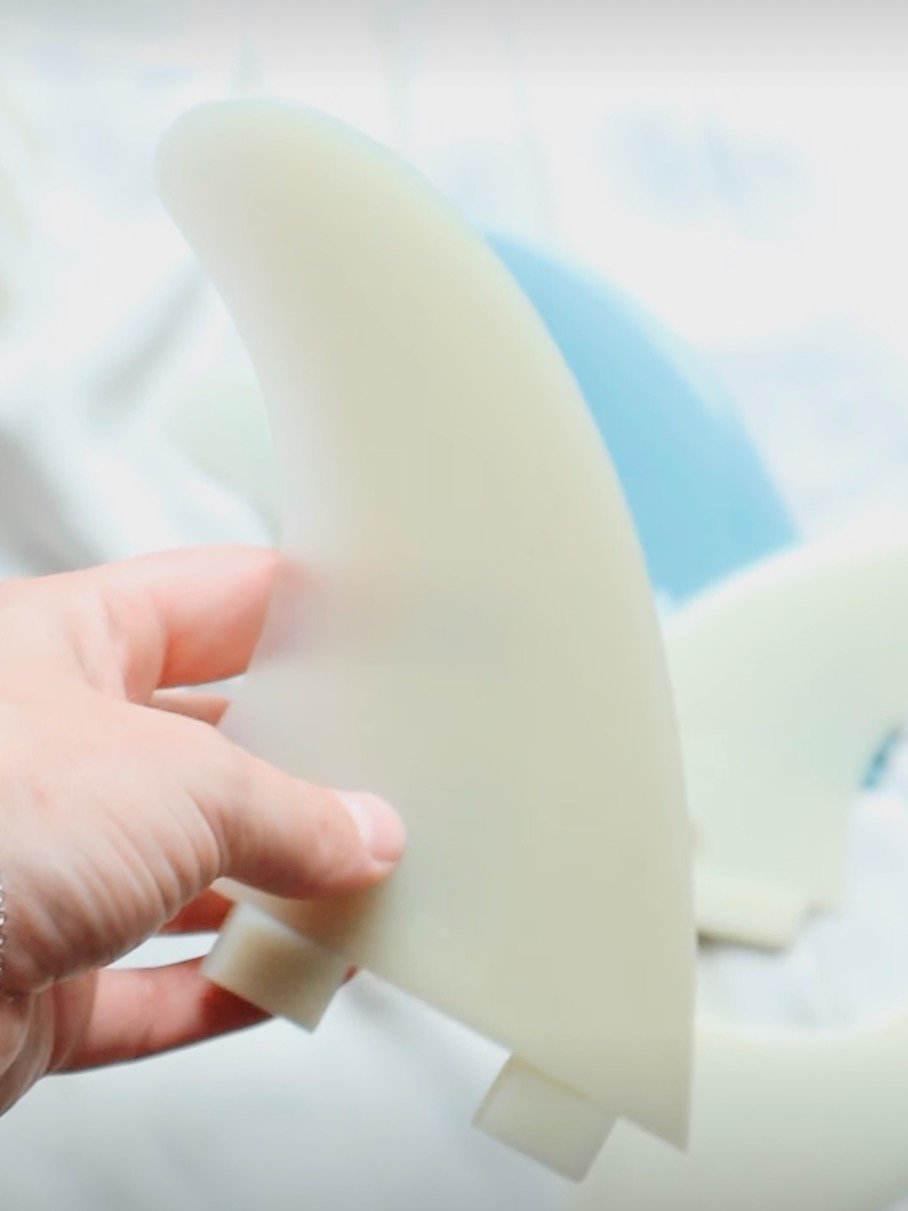
Surf fin (type, color, shape is all up to you! I used a cream-colored FCS M5 fin for this particular project, but it really doesn’t matter what fin you use).
Gesso: This is a clear or white paint material that is used to prime a surface for painting. I highly recommend using this, as it will make the surface easier for paint to adhere to. I used Liquitex clear acrylic gesso.
Pencil: This is to help you sketch your design before going in with paint. I recommend using a 2B wood graphite pencil or colored pencil.
Paint: I used Acryla gouache, but acrylic would work perfectly here as well. Watercolor and oil will not work.
Brushes: I used one super tiny detail brush for painting the design so my lines would be more consistent and precise. However, to apply the gesso and varnish, I used a large and thick brush to make the application quicker and more even. My favorite brushes are Princeton Velvetouch brushes.
Air-dry clay: To make a “stand” to hold up the surf fin. I used basic air-dry clay you can find at Target.
Varnish: This will seal in your design, protect it, and give it a glossy finish. I used Liquitex gloss varnish
Extras:
Water + water cup for cleaning brushes
Palette (you can use any palette you want. This could be as basic as a paper plate or as fancy as a Masterson Sta-Wet palette, it’s all up to you!)
Spray bottle (for spraying water onto clay to help smooth it out. Totally optional)
Fan (to help dry your clay faster)

Step 1: Gesso
Coat fin with gesso. Using a larger brush, apply at least 3 even coats of gesso to any area of the fin you wish to paint. I covered the whole front of the fin.
Make sure you let each layer dry completely before going in with another. Otherwise, you might end up disrupting the layer you just painted and will have to reapply it again.

Step 2: Sketch
After your final layer of gesso is dry, sketch your design! I used a grey colored pencil to do this, but I recommend using a 2B graphite pencil so it’s easier to erase mistakes.
NOTE: make sure you apply light pressure! If you apply too much pressure to the pencil, you risk scratching off the gesso layers below. If you need to erase, do so as gently as possible!
Take it from me, I erased too hard at one point and ended up shredding off part of the gesso and had to reapply it all over again (which was not fun, haha).
Having trouble coming up with what you want to paint? Check out my surf illustration & design Pinterest board for some inspo!
Step 3: Paint

Now for paint! Using your paint and colors of choice, simply paint over your sketch.
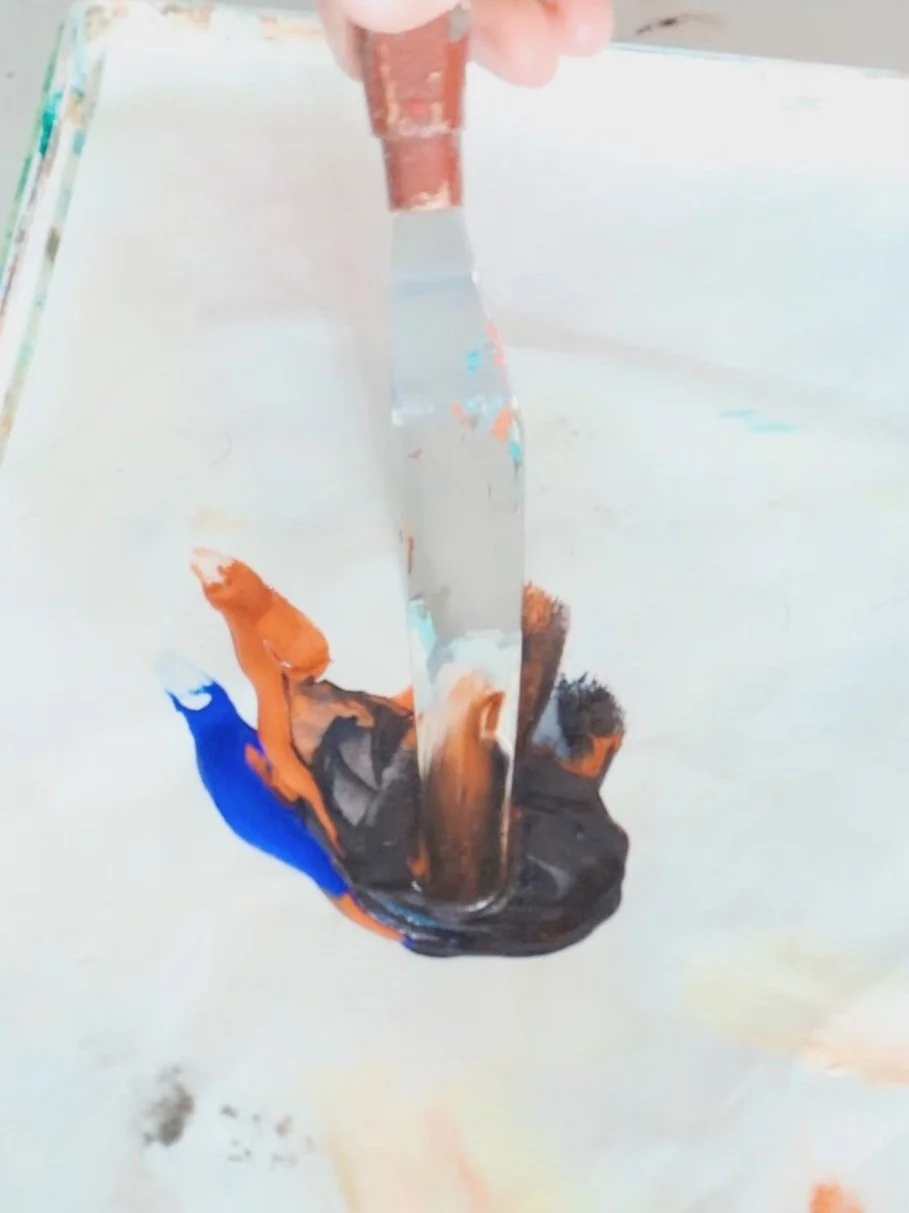
I mixed a blue-black color using raw sienna and ultramarine blue. Using a tiny detail brush, I painted over my sketch. Because acryla gouache is so opaque, I didn’t have to apply very many (if any) layers of paint in order to get a solid color.
If you want a bold and solid look, use more paint than water (don’t wet your brush too much when grabbing paint; use a higher paint to water ratio).

Step 4: Clay
Because I wanted a way to display the surf fin upright, I decided to make a sort of “stand” for it using air-dry clay.
To do this, roll a handful of clay into a log shape. Then insert the fin into the top and began shaping the clay around it to form a solid and polished base. Spray water onto the clay to help smooth it out more.
You can make your stand look however you wish! Just make sure it is as flat as possible on the bottom so it will stand up balanced and straight.


Step 5: Air-dry
Once you are done with all the above steps, let your clay air dry completely. Make sure you do not use oven-bake clay because that would mean baking the clay AND the fin, which I can’t imagine would be a wise idea.
If you’re like me and are dying to finish it, you can speed up the drying process by setting it in front of a fan and/or in the hot sun (which essentially bakes it naturally and speeds up the drying process tenfold).
However, If you do have a lot of patience, look at the instructions on your type of clay to see how long it should take to dry.
Step 6: Paint Clay
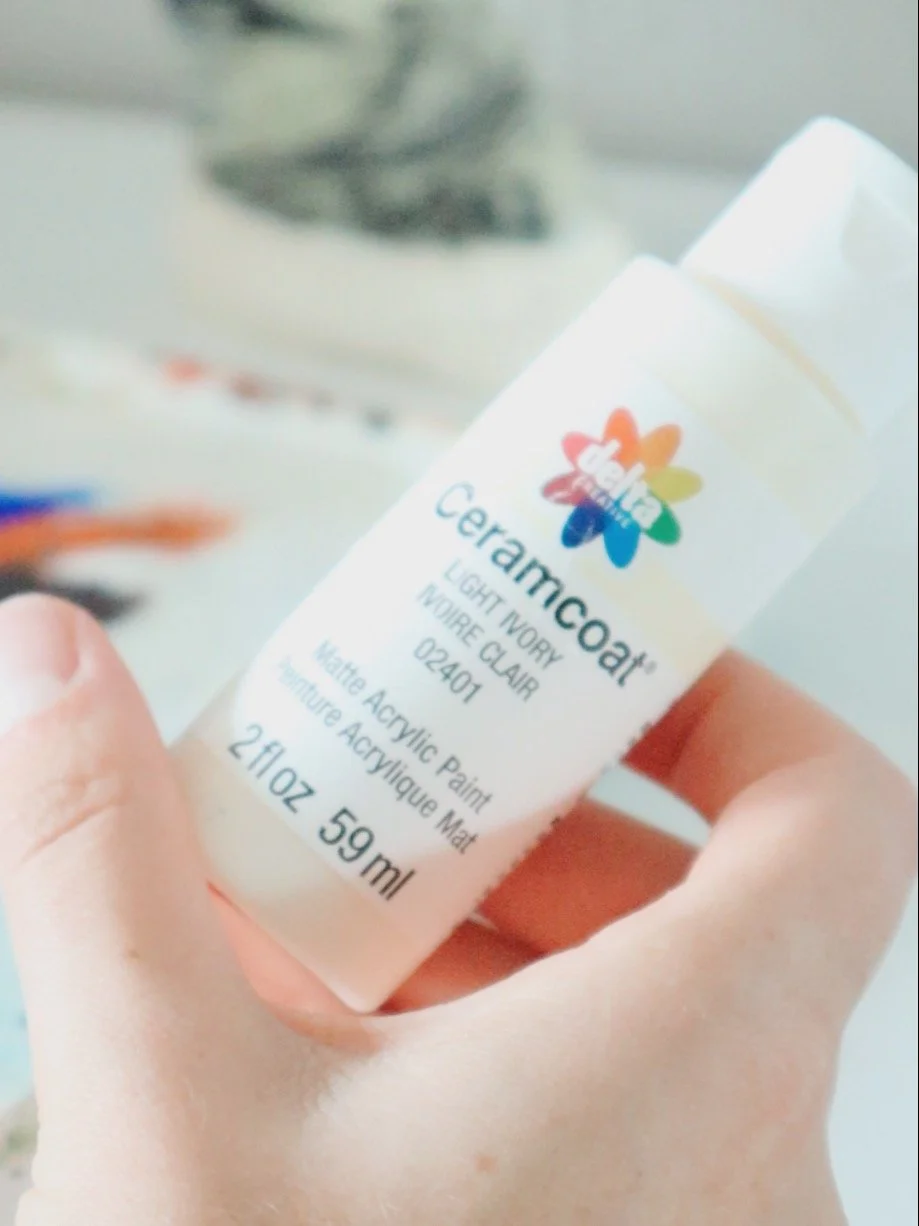
Once the clay is dry, paint it using your color of choice. I used a cream-white acrylic paint that was a little similar to the color of the fin, but you can go nuts here!
I recommend applying at least 2 layers of paint, depending on how opaque you want it to be. I painted the entire clay base (including the bottom) but again, this is all up to you!


Step 7: Varnish
Finally, it’s time to protect it from damage and give it a polished look. Coat the fin and the base with 1-2 layers of varnish. Once again make sure that each layer is completely dry before adding another.
Don’t worry if it looks like it is covering up your painting! It should dry clear.
BOOM! You are done!
Your gorgeous surf fin can now adorn the seashell-covered and Surfer’s Journal-lined shelves of your home.
Be sure to share what you create on Instagram and tag me @artofellaeland for a chance to be featured on my story!
I can’t wait to see what you come up with.

